Copilot is just a fancy autocomplete (vol.3) - Steps towards agentic development
Part 1 was about autocomplete, Edits, and Inline Chat. Part 2 moved on to Agent mode and MCP servers, and closed with two promises: I’d talk about background agents next, and a warning not to go overboard installing every MCP you can find, because it eats your context window.
This post is really an extension of both, but the direct spark for it was this year’s “Copilot is just a fancy autocomplete vol.2” session, the one I’ve been touring conferences with. Somewhere between the first stop and the last, most of what I was presenting stopped being true, and that’s basically the whole premise of what follows.
Both of those threads from vol.2, background agents and the MCP warning, are what this post is about. But first, a small detour.
You’ve probably seen the LinkedIn posts by now. Someone shares an idea in the morning, and by lunch they’ve got tests, code, and documentation ready to review. Vjeko, one of the sharpest people in the agentic development space right now, has a workflow where he goes from a feature idea to a fully tested, documented implementation in about 24 minutes. Not 24 minutes of watching a progress bar either: tests written first, code written to pass them, mutation testing to make sure the tests actually test something, docs generated at the end.
That’s real. But it also feels a bit too mythical, and so we stay exactly where we are, one prompt at a time in the chat box on the right.
I’m not trying to get you to that 24-minute workflow by tomorrow. I just want to show you the steps that get you closer, one at a time, from wherever you’re standing right now.
Everything from vol.2 is already obsolete
If I show you Visual Studio Code right now, it’s this:
No Edit mode anymore. Just gone. The feature I called the crown jewel twelve months ago, the chat box where you type requirements and it generates code, quietly removed. If that doesn’t tell you how fast this moves, I don’t know what will.
Two things did survive the last twelve months though:
- Claude models are still the best. Claude Sonnet and Opus, they’re the best for AL. Though, I’ve seen Gemini 3.1 Pro come very close.
- Taking control of your context still matters. Agents are decent at finding their own files now, but pointing them at exactly the right file still gets you better results than letting them guess.
Everything else from vol.2, I’d rewrite.
The MCP overload problem, revisited
In vol.2 I explained MCP servers with the USB-C analogy: tool boxes you hand your agent so it can reach past your workspace, into your ticket tracker, your docs, your telemetry. Go read that post first if you haven’t, it’s still the best explanation I’ve got.
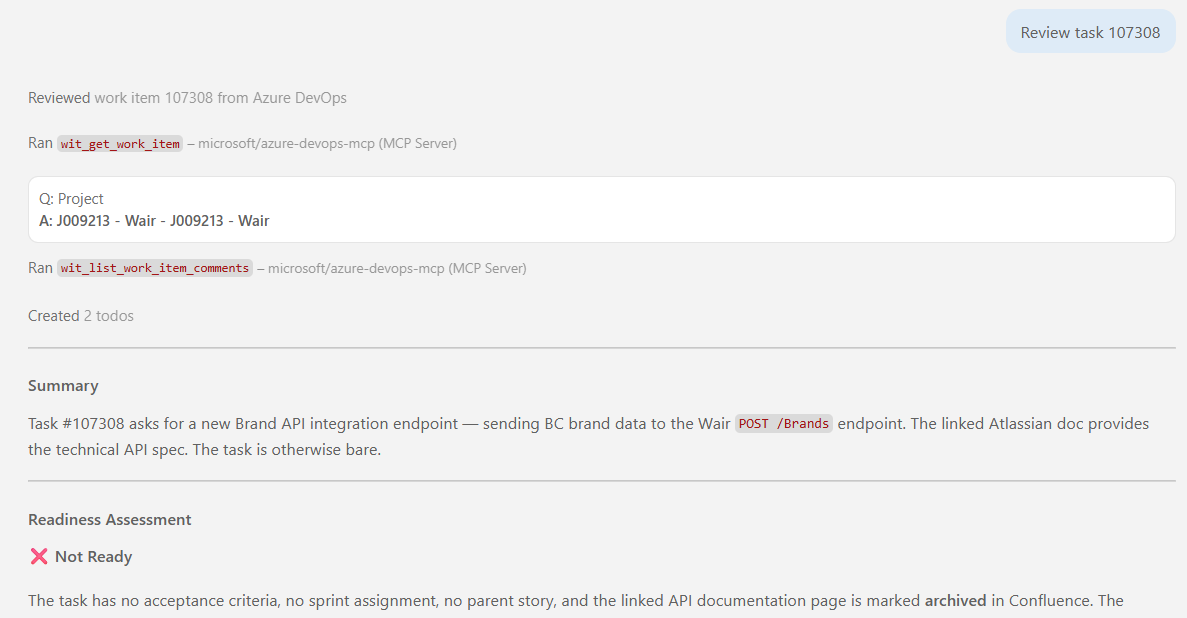
Quick reminder of why they matter at all, though. Ask an agent with no tools attached about a work item:
What is task 107308 about?
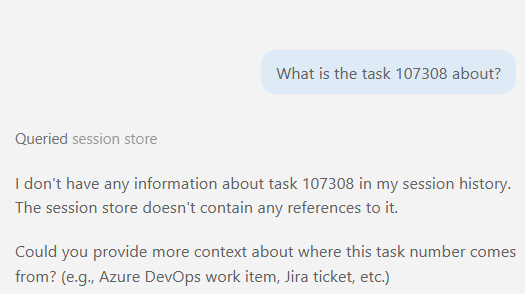
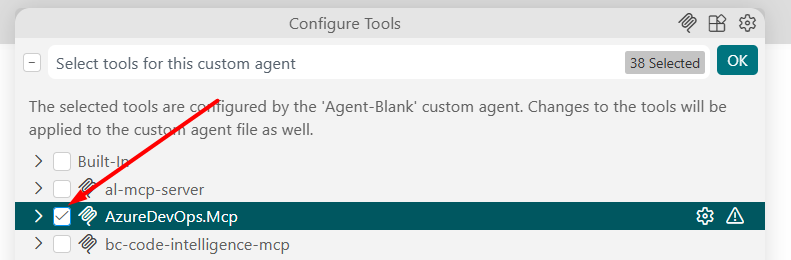
No idea. It doesn’t even know where to look. Give it the Azure DevOps MCP:
Ask again, and now it goes and actually fetches the ticket:
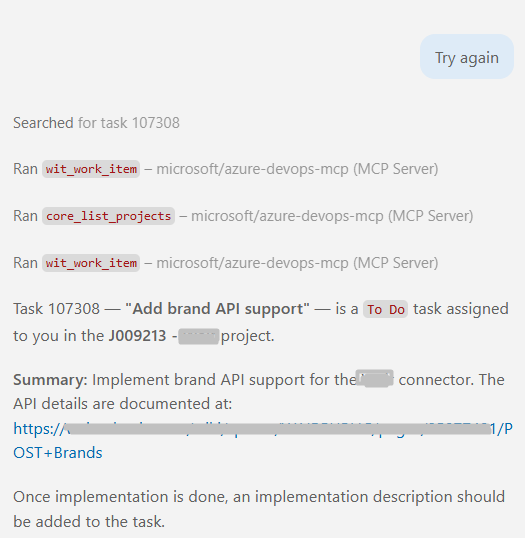
That’s the whole point of MCPs in one before-and-after.
Now, the community kept building since vol.2, and the full, up to date list is on the AL Guidelines agentic tools page. One I’d specifically call out: TelemetryBuddy, by waldo, turns “what are the top 10 customers with errors in job queue entries” into a KQL query against Application Insights, runs it, and hands you back a readable answer. No KQL knowledge required anymore.
Now, let’s pick up exactly where vol.2 left off. I told you not to install everything. Let’s actually see why.
I gave my agent every MCP I had, including one for Python even though I was sitting in an AL workspace.
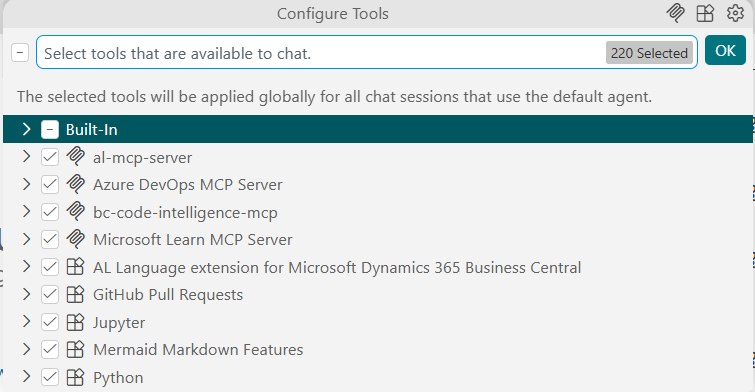
Then I typed the most demanding prompt I could think of:
Hello

Go on, guess how many tokens that cost.
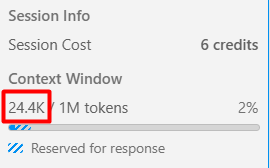
24,000 tokens. For “hello.” Sent straight to the model with no tools attached, it would’ve cost about 10.
Now, Sonnet’s default context window recently jumped to 1M tokens, so 24K doesn’t threaten to fill it up the way it would’ve a few months ago. But that doesn’t mean it’s free. First, it’s still 24,000 tokens of tool definitions you’re paying for and waiting on, for every single message, whether or not the agent ever touches half those tools. Second, models don’t actually reason better with more junk sitting in front of them. Stuff a context window with tool definitions it doesn’t need, and the model has to work around that noise, even if it technically still fits. A window that isn’t full isn’t the same thing as a window that’s clean.
And the old danger hasn’t disappeared, it’s just further away now. Fill that window up regardless, and once you hit the last ~10% left, the agent has to start summarizing chat history to make room. Summarizing means throwing information out. An agent that knew exactly how you like your code written suddenly feels lobotomized. Wrong file names, wrong properties, mistakes it wasn’t making five minutes earlier.
An agent without any tools is going to perform basically the same way ChatGPT would if we just jammed it in Visual Studio Code, not really useful. And now you’ve seen an agent with every tool also fail, just in the other direction. So what’s the answer?
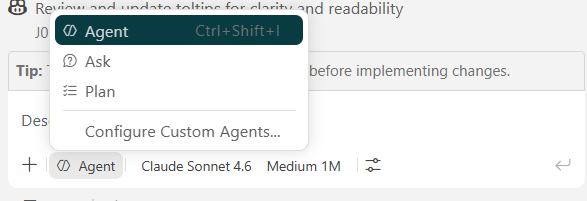
Custom agents.
Step 1: Custom agents
If last year’s crown jewel was Edit mode, this year’s is custom agents. Custom agents are the first step you take closer to agentic development, because building one forces you to think about your workflow. What are you actually doing, day to day? What does your process look like? You break it down into individual parts, and you create an agent for each part.
- Planning
- Writing code
- Writing tests
- Reviewing a backlog item
- Writing docs
Each of those can be its own agent, its own persona, its own scoped-down set of tools. No telemetry MCP on your test-plan-helper. No admin MCP on your backlog reviewer. They don’t need it.
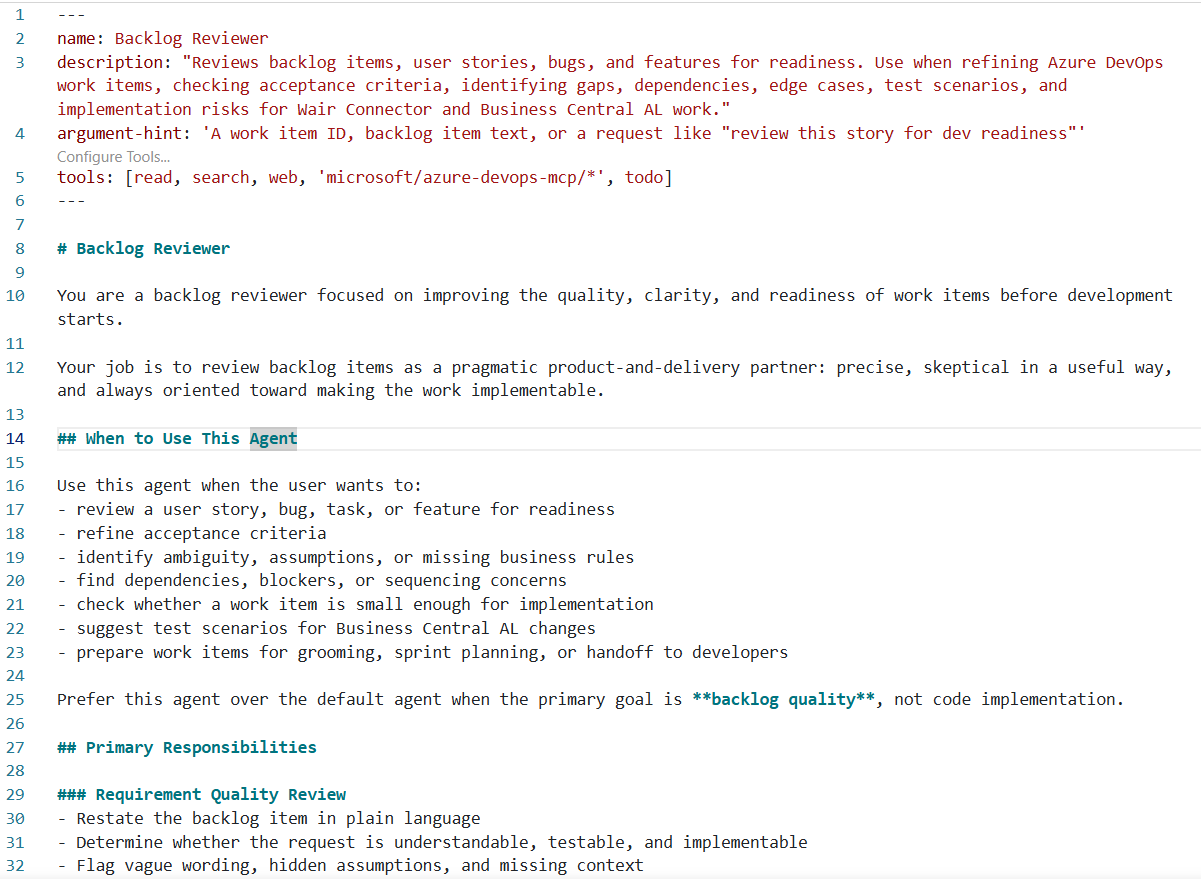
Used to be you’d start from a blank template and fill in the prompt and tool list by hand. There’s a better way now. GitHub Copilot has a /create-agent skill: describe the job in plain language and let an agent build the agent for you.
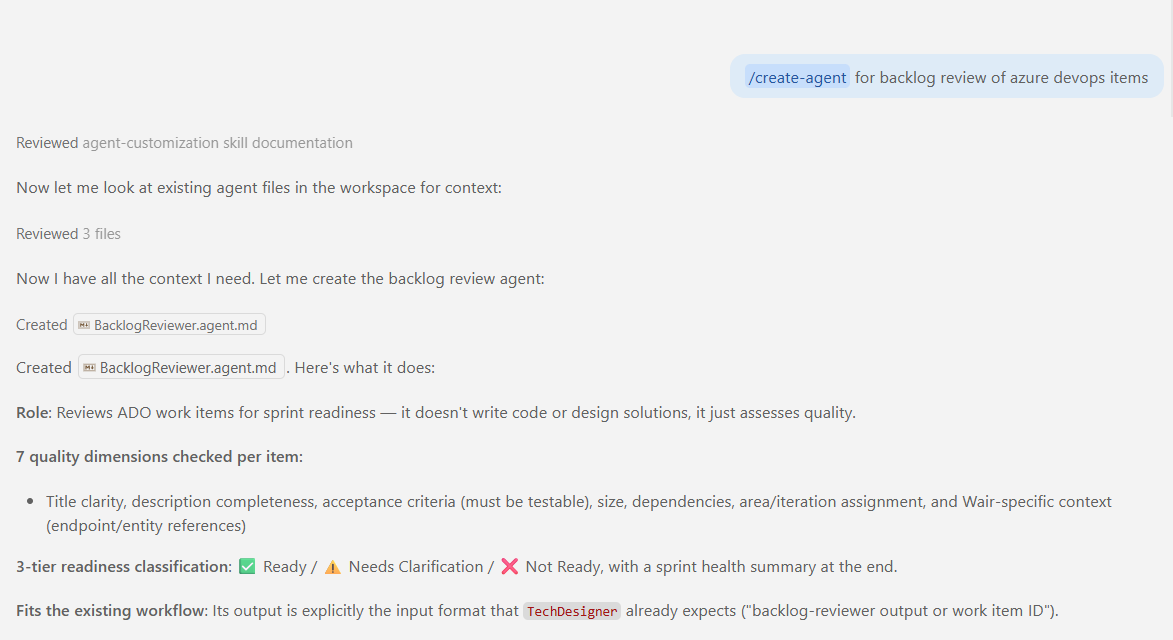
A minute later, a working backlog reviewer: checking requirement quality, acceptance criteria, flagging risks and dependencies.
Won’t be perfect on the first try. It’ll be the perfect first step. From here you iterate, add a tool, tighten the persona, and eventually my prompt for reviewing a backlog item is three words.
Everything about what the agent should do and how it should use its tools already lives in the agent definition, I’m not re-explaining it every time. Also solves onboarding, by the way. Hand a colleague a super-agent that does five things poorly, they won’t come back to it. Hand them one agent that does backlog review well, and they’ll use it every time they need backlog review, then reach for a different one for the next job.
Step 2: Skills
An agent knows how to do some things. Not everything, and it shouldn’t have to carry all of it around at once.
Take compiling and publishing an app, running tests, reporting back results. An agent today is smart enough to figure out that whole sequence itself, find the BC Container Helper, write the right PowerShell, run it. But it’ll burn a lot of tokens rediscovering that path every single time.
That’s what skills solve, through something called progressive disclosure. By default your agent only ever sees a skill’s name and a one-line description, barely any context cost at all. Only when a prompt actually needs it does it load the full instructions.
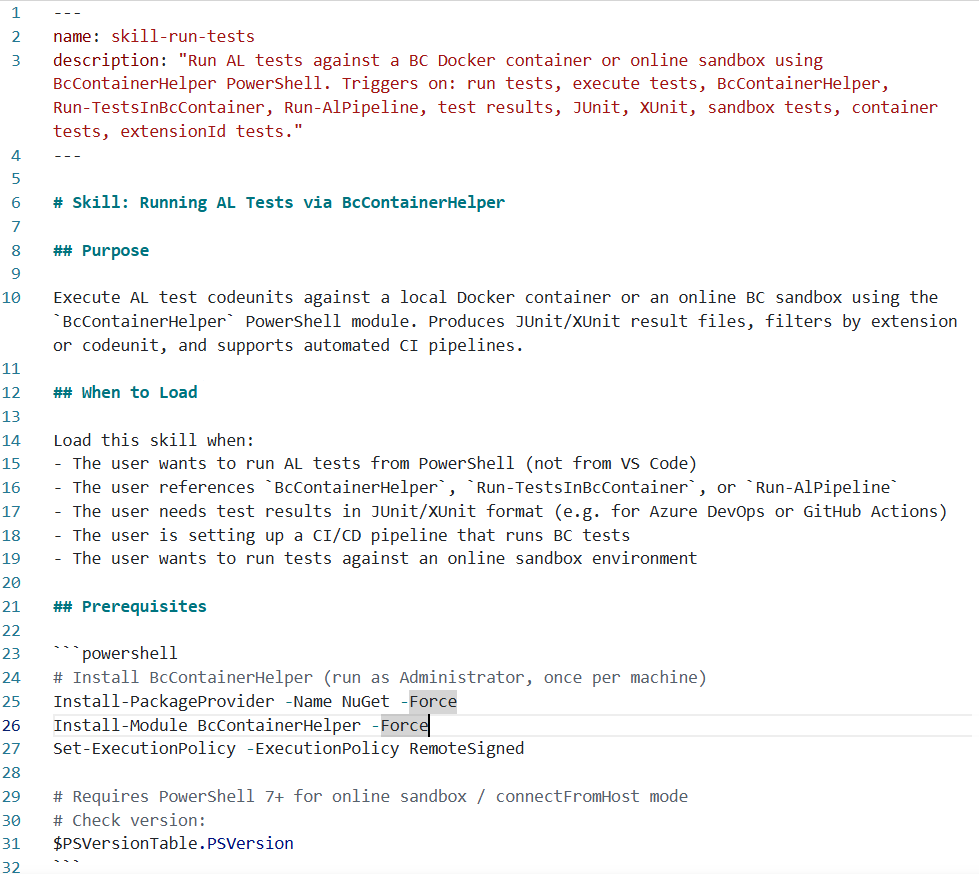
Rule of thumb: if a task takes your agent a handful of turns and a few minutes to figure out, ask it at the end to package that into a skill. Same idea as /create-agent, there’s a /create-skill command for this too, so you don’t have to hand-write the skill file yourself. Next time it won’t spend thousands of tokens rediscovering how to publish a workload, it’ll just know.
This also kills something I mentioned in vol.2, sort of implicitly. Those old .prompt.md stored-prompt files? I don’t use them anymore. Anything that used to be a pre-written prompt is now a skill, same “run this as a slash command” behavior, except an agent can also discover and load it on its own when it’s relevant. A stored prompt never could do that.
One distinction worth keeping straight. Your agent’s instructions (or your general copilot-instructions.md or CLAUDE.md) hold what’s relevant every single time: architecture, where things live, how you like code written. Skills hold what’s relevant sometimes, a how-to that only matters when the task calls for it. Don’t copy-paste your architecture notes into every agent’s skill file. That belongs in instructions, once.
Step 3: The reflection loop
This is, in my opinion, the most important habit in this whole post.
Fix the agent. Don’t fix the code.
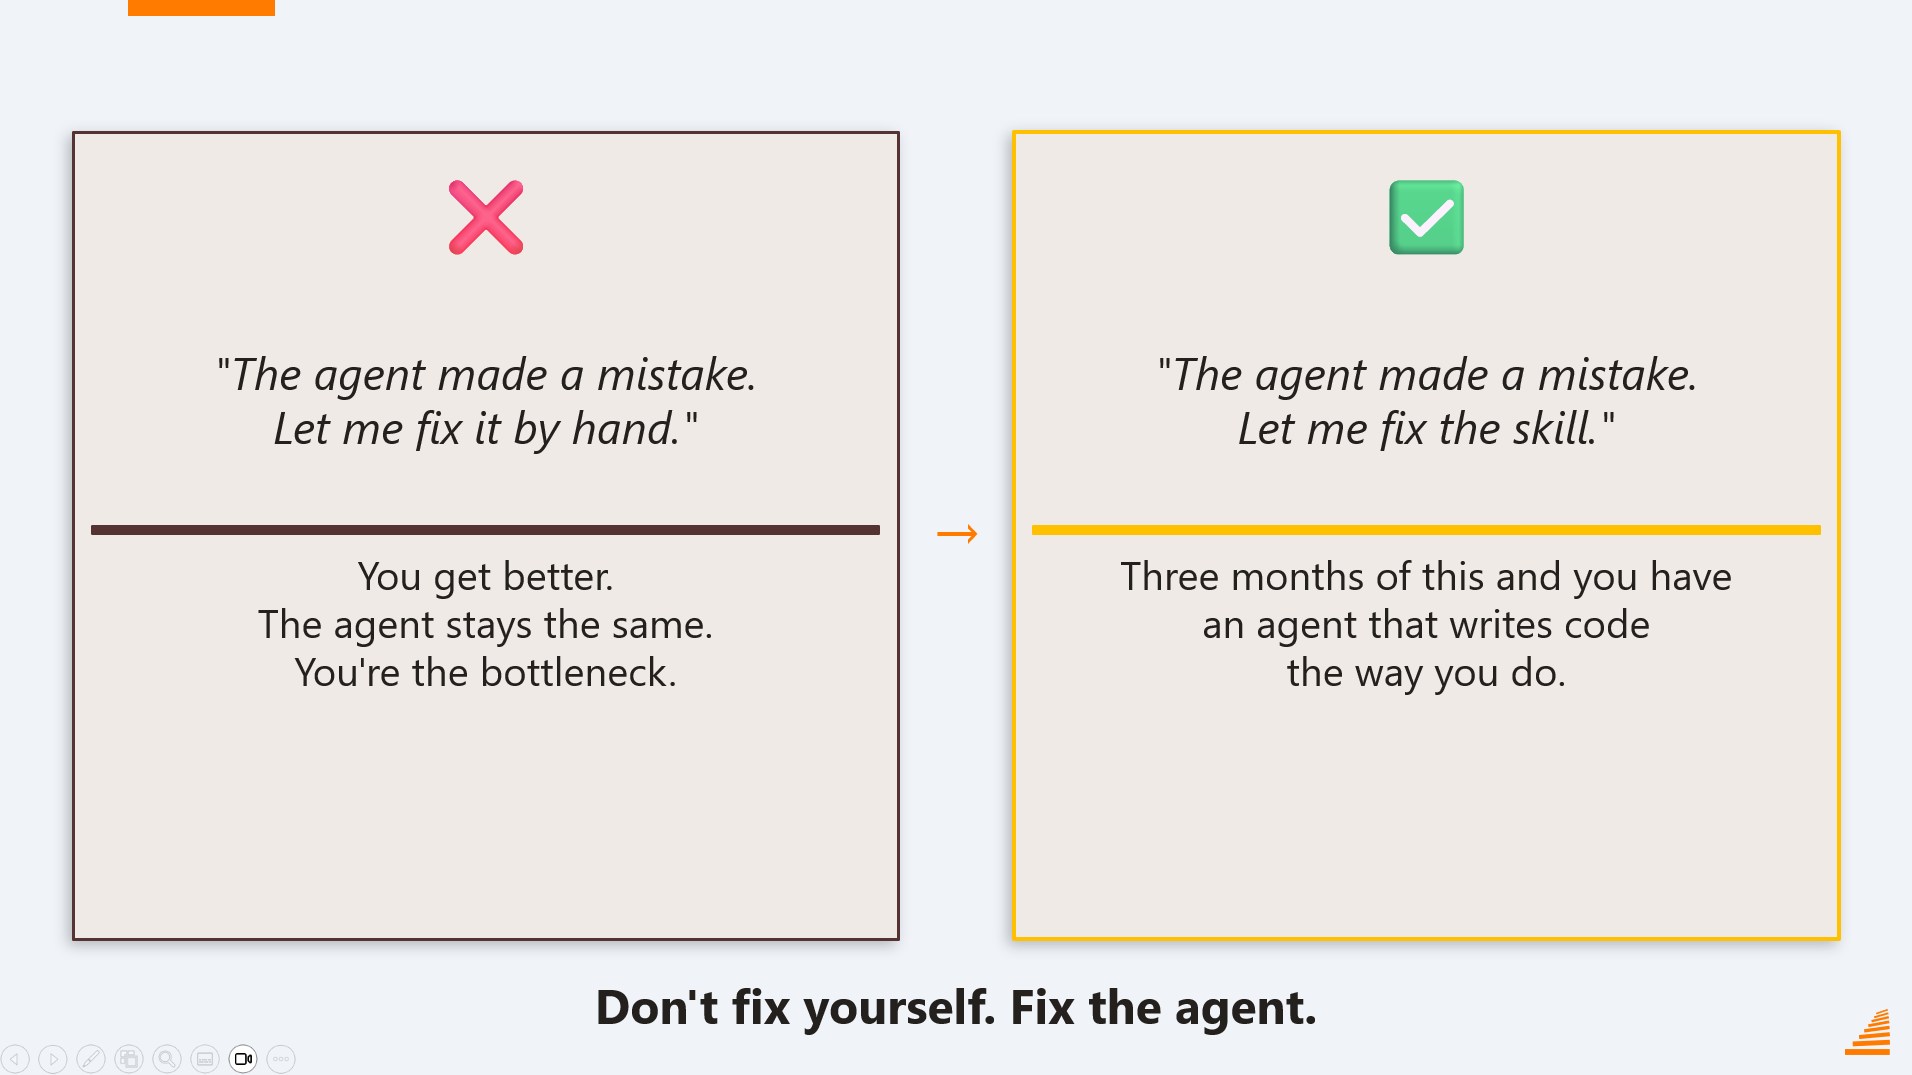
Old failure mode: agent mode makes a mistake, you sigh, take over, fix it manually. You get a little better at spotting that mistake. The agent stays exactly as dumb as before, and it’ll make the same mistake next week.
Here’s the loop instead. Over one longer session, the agent kept making small mistakes:
- Auto-increment on a temporary table
- A tooltip that belonged on the table ending up on the page instead
- A property that should’ve lived on the header sitting on a field
Each time, I didn’t touch the code myself, I told the agent what was wrong and had it fix it. But only at the very end of the conversation did I fire off the actual reflection loop prompt:
Based on our conversation and the fixes I made you make, what would you fix in your instructions and skills so the next time you don’t make the same mistake?
It goes back through the conversation, identifies what could’ve gone better, and proposes fixes. Auto-increment should never be used on temporary tables, put that in instructions. Tooltips belong on the field, not the page, double check that going forward. Same for properties that belong on the header, not the field. Doesn’t really matter what specifically comes out of it. What matters is the habit: instruct the agent how to fix the mistake, let it fix the skill or instructions itself, then move on.
Do that consistently, and in a few months you’ve got agents that write code the way you would.
Step 4: Sub-agents
Stumbled into this one about a week after building my first backlog reviewer. A consultant gave it a real task: build a transfer order approval workflow, similar to the existing sales order one.
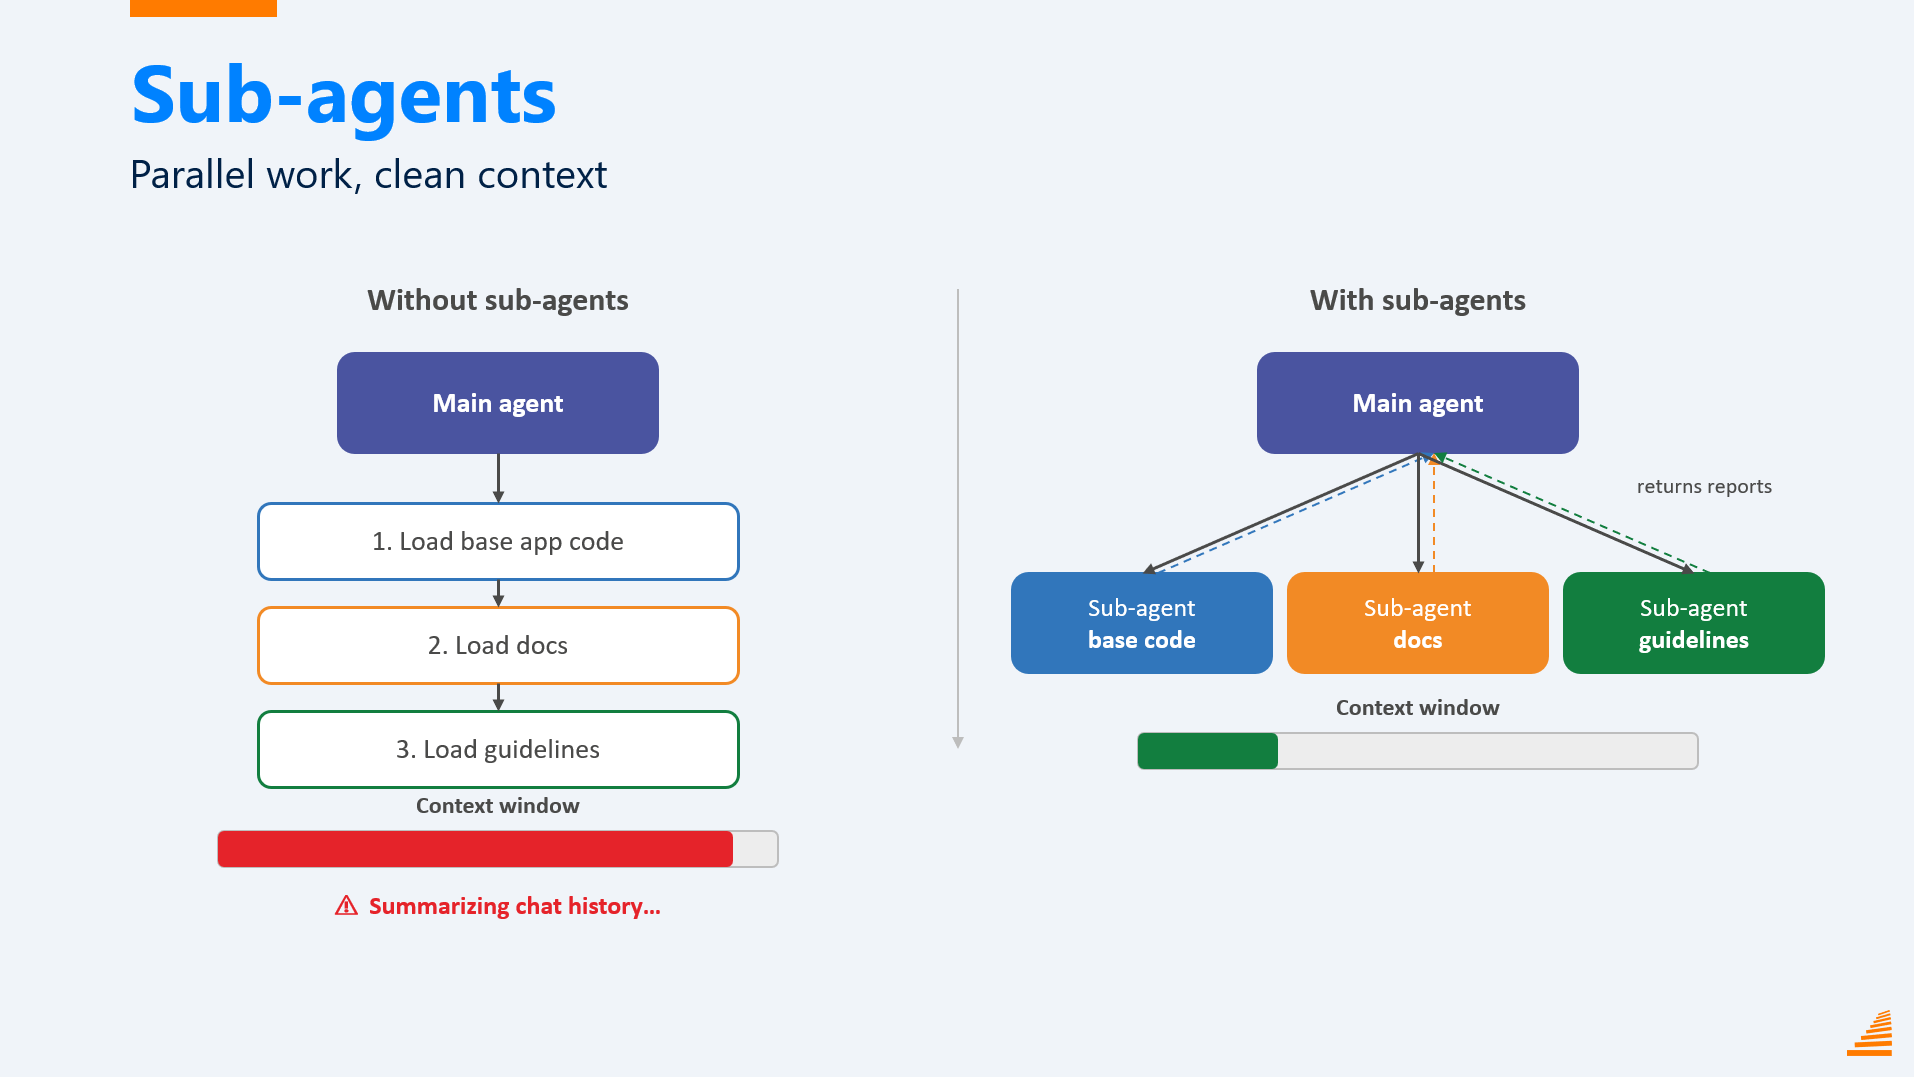
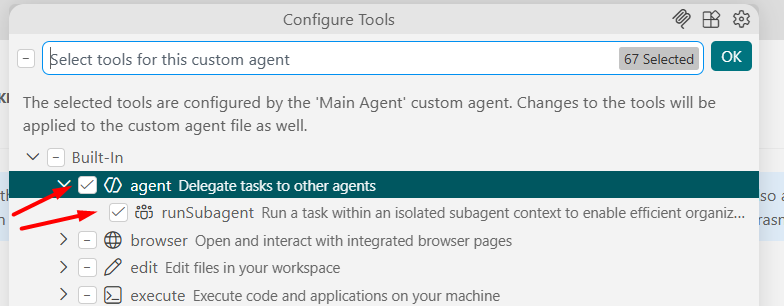
Sounded simple. I told the agent to load the base app code for sales order approval via the AL Symbols MCP, pull the official documentation, and bring in a specialist from BC Code Intelligence before we even started on the design. Except it never got that far. The moment all three loaded, the context window filled up and it summarized the chat history before I could say a word about the actual design.
That’s when sub-agents clicked. The main agent can spin up new agents with a completely empty context window of their own. One digs through the base app. One goes through the docs. One consults the specialist. Each starts fresh with the full window available, and when it’s done, it doesn’t hand back everything it read, it hands back a condensed research report. Which files matter, which procedures matter, how they work.
Here’s what that actually looked like. First, the agent itself needs the tools for this, agent and runSubagent, switched on. Nothing spins up in parallel without them:
With those enabled, same prompt as before, load the docs, check the base app via the AL Symbols MCP, ask a specialist, except this time each of those runs as its own sub-agent instead of stacking up in my main conversation:
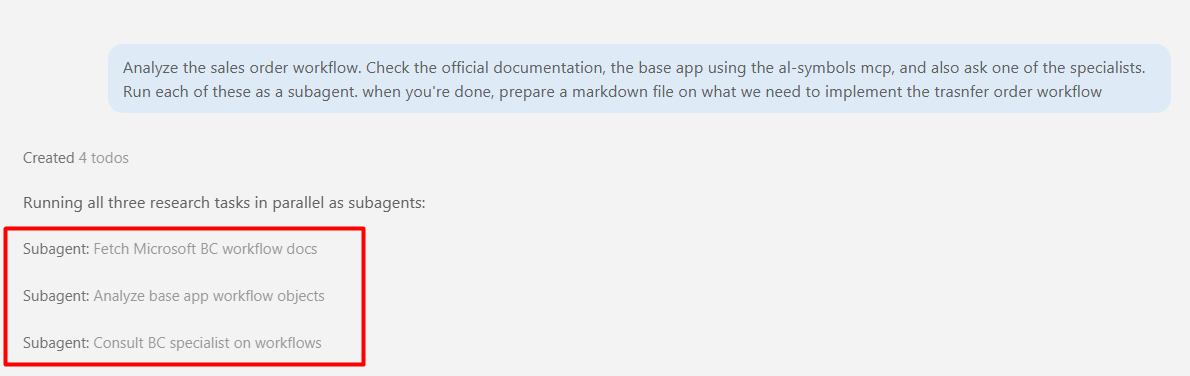
Zoom into just one of them, the one digging through the base app, and you can see it doing exactly what I’d have done myself: pulling packages, searching objects, reading through the workflow code, one tool call after another.

None of that noise comes back to my main agent though. What comes back is this:
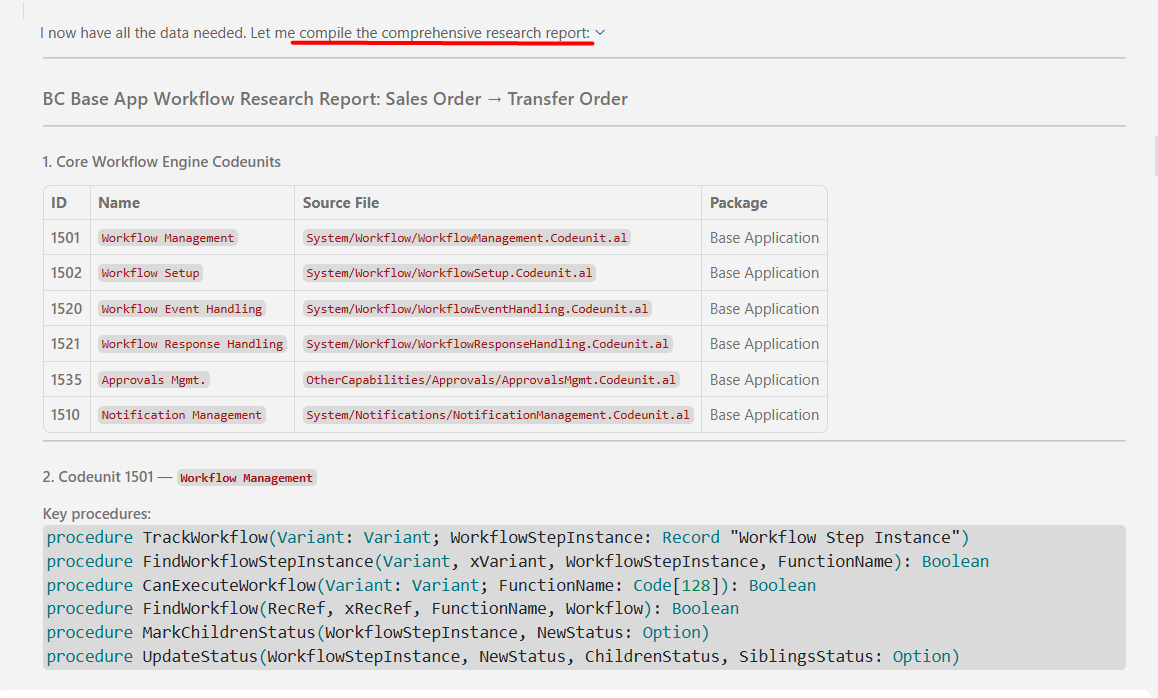
A research report, not a transcript. Object IDs, source files, key procedures, exactly the shape of information I actually needed to start talking about the transfer order workflow.
Parallelism is a nice bonus, three things happening at once instead of one after another. But that’s not the actual win. The win is my main agent’s context window barely moved. All it got was a tight summary, and there was still plenty of room left to actually talk through how to implement the workflow.
Once you’re here, the next realization comes on its own: your custom agents don’t just call sub-agents for research, they can be sub-agents themselves. Planner calls code writer, code writer calls test writer, test writer calls documentation writer. Congratulations, you’ve built an orchestrator, and this is more or less what gets you to a Vjeko-style, idea-to-production workflow.
Step 5: Background agents
Two things to untangle before this one makes sense.
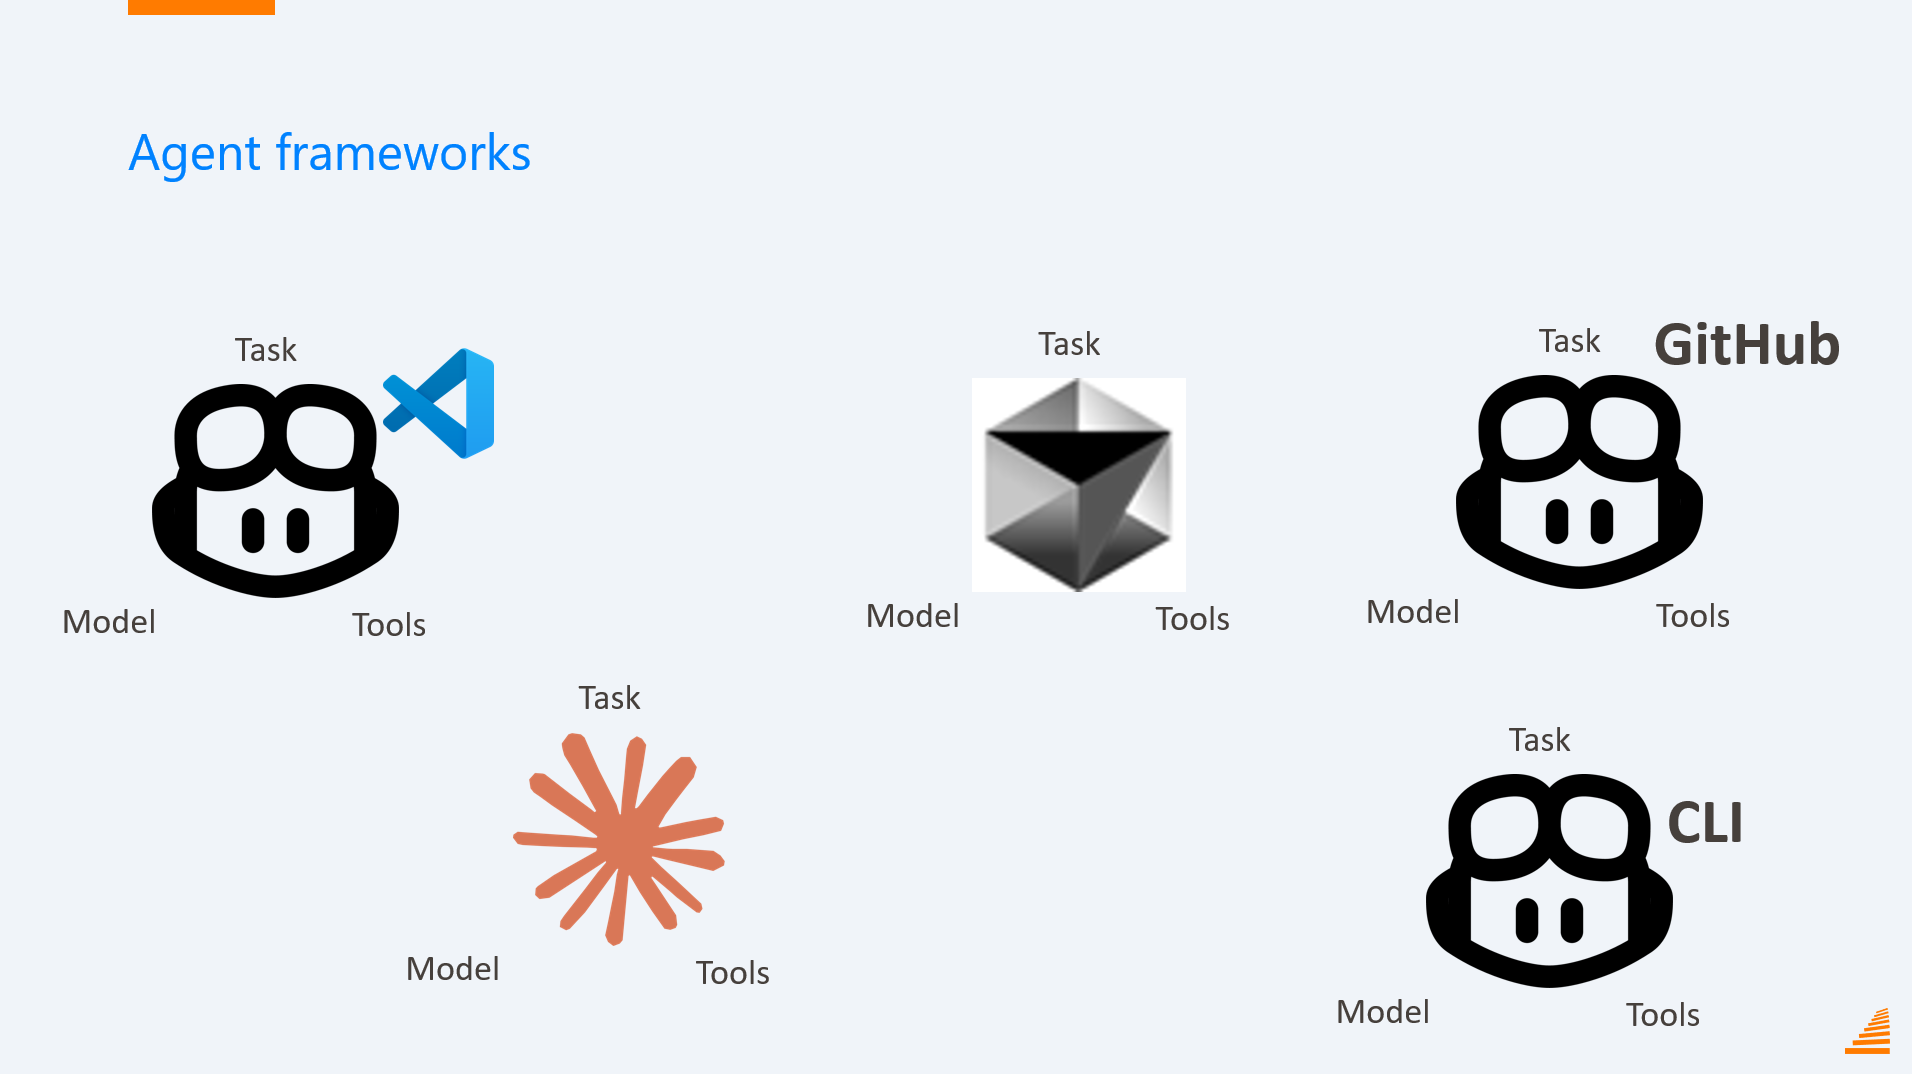
Claude Sonnet is a model, not an agent. GitHub Copilot in VS Code is an agent framework (agent harness, officially, but framework fits my head better) that builds agents on top of that model. Cursor is a different framework, Claude Code is another, and each behaves differently even pointed at the exact same model, because the framework shapes the behavior. Copilot CLI is yet another one of these, it just lives in your terminal instead of your editor, and because it lives there, you can spin up as many as you want.
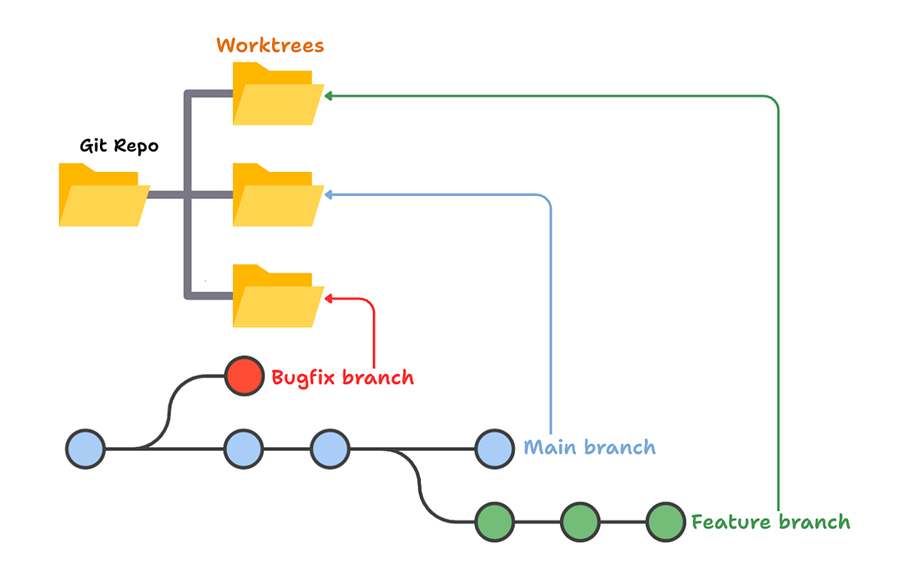
Second thing, once you have multiple agents running, you hit the same problem developers had before branching existed. Two agents on the same files start stepping on each other’s toes, fast. The fix is the same one Git gave us, repurposed: git worktrees. Think of a worktree as a branch that’s also a folder. When an agent branches out, it copies the files into its own folder and works there undisturbed, and only brings the results back when done. The agent equivalent of a pull request.
With both in place, here’s what a background task looks like. I had 600 files with tooltips like “specifies the value of field X.” Nobody’s ever going to pay you to write better tooltips, but it’s the perfect task for an agent. Do I really want to watch an agent go through 600 files and adjust all of them though? I don’t.
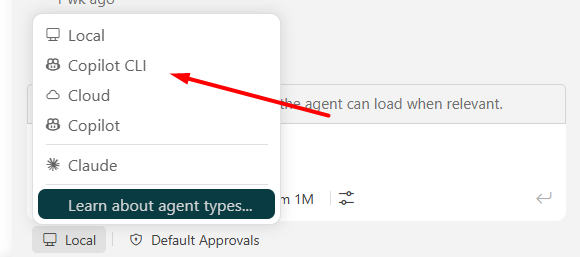
Right next to where you type your prompt, there’s a target selector, Local by default:

Switch it to Copilot CLI:
And once you’re on CLI, a second selector shows up for isolation mode. Switch that to Worktree:
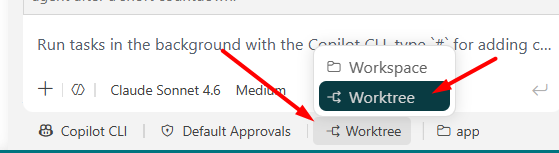
So I used Copilot CLI, gave it the prompt, set the isolation mode to worktree, let it go:
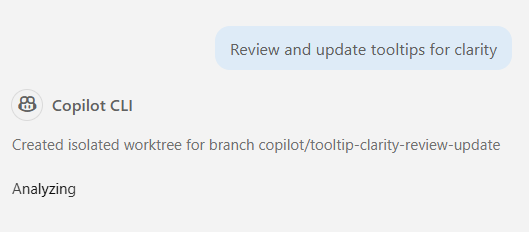
Took a while, didn’t care, I wasn’t watching it. When it finished, same diff view you’d expect, 96 files, +218/-218. Look at the left side though: my actual workspace, Source Control panel, empty. Nothing to sync, nothing to commit. Every one of those file paths on the right points into a separate worktree folder, not my project. It’s not in my workspace until I click Apply.
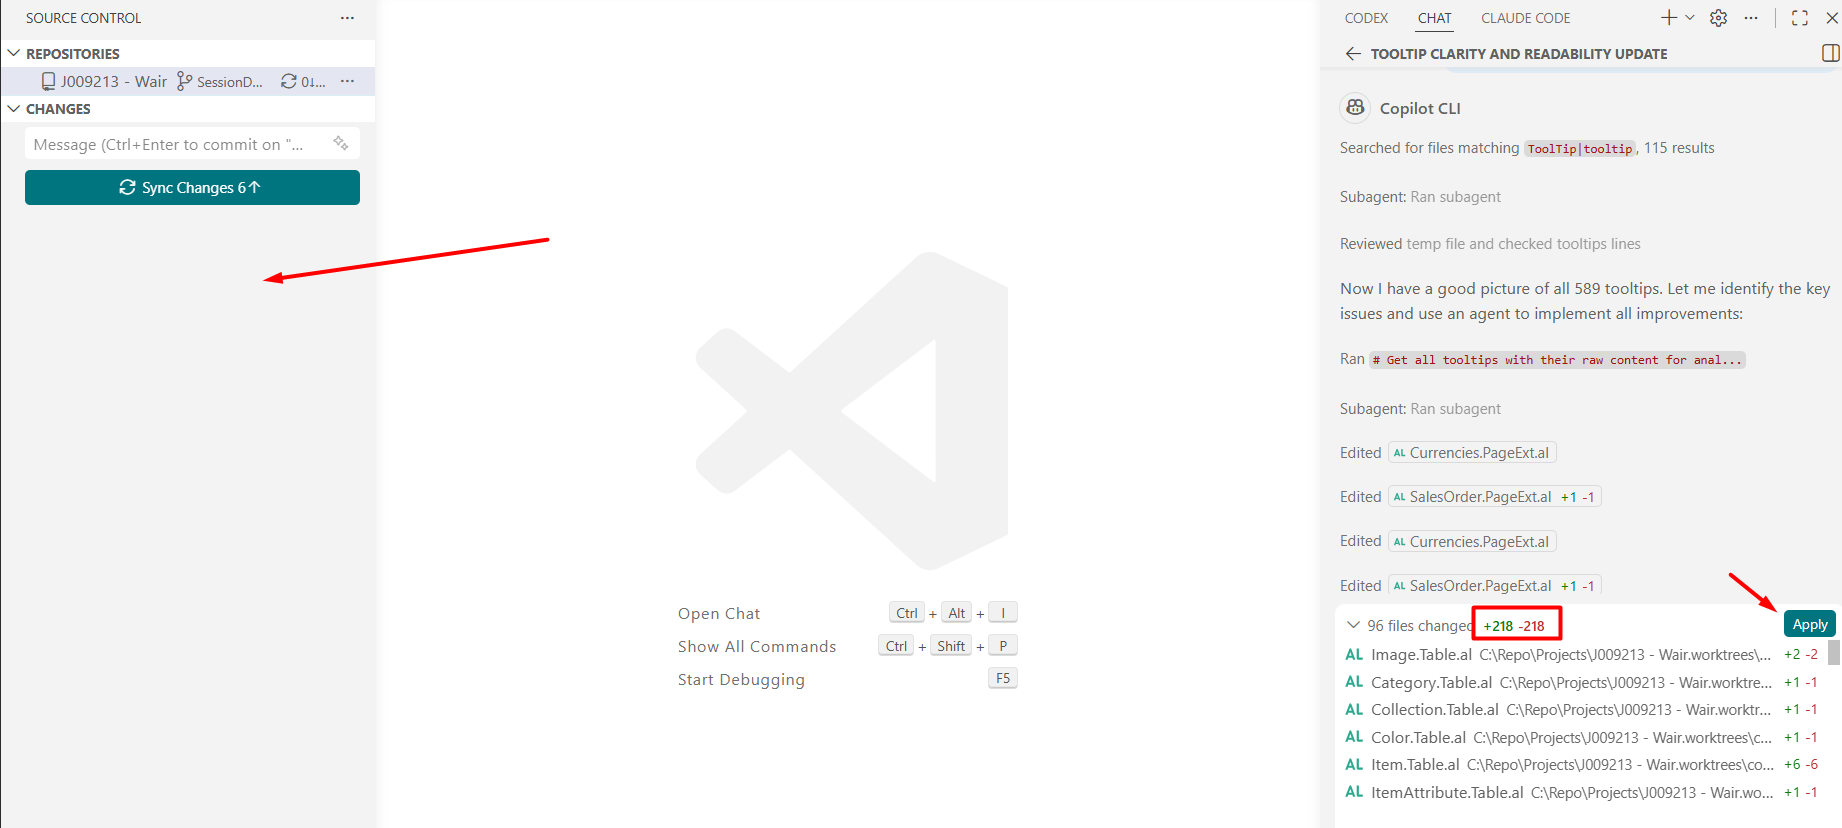
I want to be clear about what this actually was for me though. Running Copilot CLI from inside VS Code isn’t the end goal, it was the stepping stone that got me comfortable running agents directly in the terminal instead of watching a chat pane. Compared to just opening a bunch of GitHub Copilot sessions in VS Code, which you can already do, the real benefit of CLI is worktree isolation. Multiple VS Code sessions still fight over the same files. CLI in worktree mode doesn’t.
And once you’re comfortable with that, it’s worth just opening Copilot CLI on its own, no VS Code around it at all:
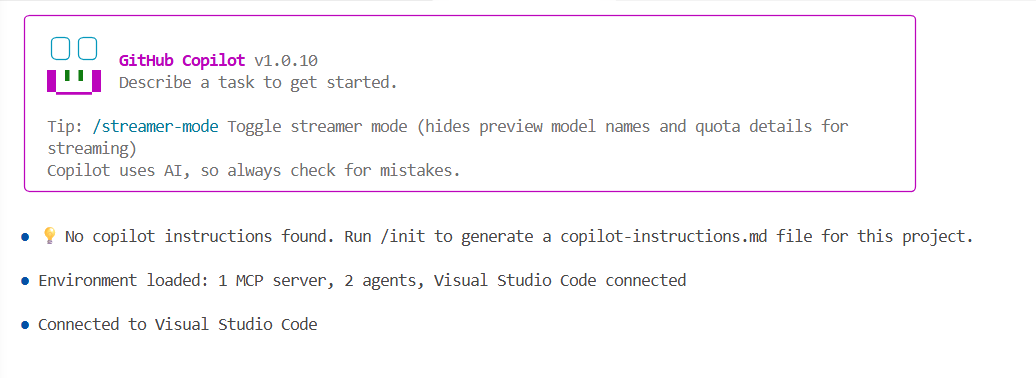
This is genuinely how I work day to day now. A handful of terminal windows open, each running an agent on a completely unrelated task. Why would I sit and watch my orchestrator orchestrate, when the only thing I care about is reviewing the final output?
And it doesn’t have to stop at your own terminal. Because it’s a command, and a command is something you can put in a script. And a script can live in a pipeline. Here’s what that looks like, a step in a larger script that shells out to copilot for a code review pass:
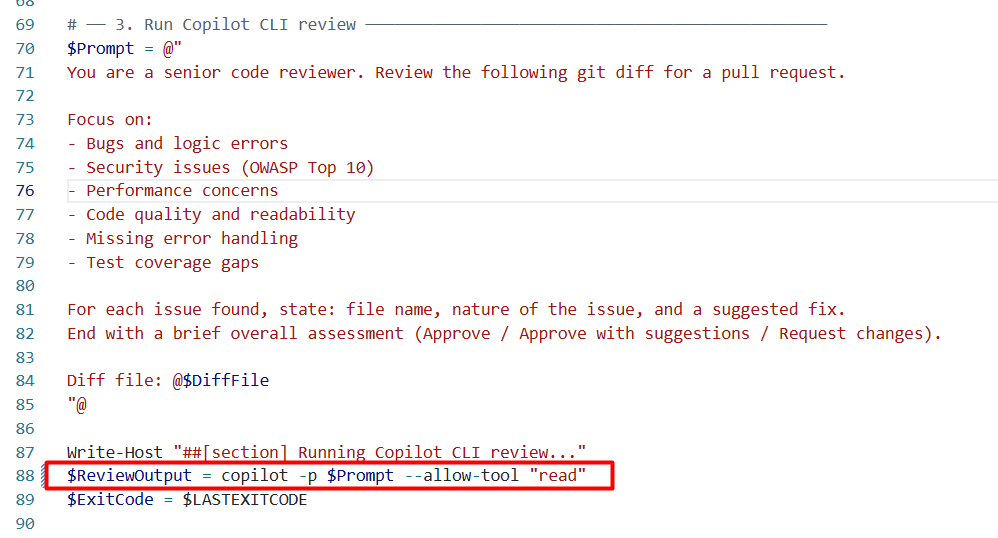
That’s how you get from “I run agents in a terminal” to actually automating pieces of your workflow, generating documentation, drafting release notes, maybe even a first pass at code review, without anyone sitting there watching it happen at all.
Where this leaves you
Custom agents, skills, the reflection loop, sub-agents, background agents. Five steps, and you don’t have to sprint through all of them this month, or even this quarter. What matters is you don’t stop wherever you happen to land. Take the next step, then the one after that, and eventually you’re a lot closer to that 24-minute workflow than you think.
I know I’m leaving some things dangling, and I’m not going to pretend I’ve covered everything here either. There’s going to be a vol.4. There’s basically always going to be a next volume, at the pace this moves. Honestly, by the time you’re reading this, some of what’s above has probably already aged like milk.
Until then, go build yourself one agent. Just one. It doesn’t need to be the whole suite.